+1 Stone Skipping Controls & HUD
Find every important button before your first long throw session.
Learn the panel, then learn the meta
+1 Stone Skipping is easy to misunderstand if you cannot find Throw, the Shop, training pads, or the Rebirth meter. This page is the controls and interface map for Meow Labs’ river simulator. For strategy after you know the buttons, jump to Getting Started and the rest of the Guides Hub.
Keyboard and basic actions
| Input | Action |
|---|---|
| W A S D | Move your avatar around the hub, pads, and riverbank |
| Space | Jump |
| E | Interact with prompts (shop terminals, certain pad or world interactables) |
| Throw button (on-screen) | Send your equipped stone across the main river |
There is no separate “charge power” minigame on Throw. Distance comes from Skill and your stacked stones, pets, rebirths, and potions. If throws sink early, fix Skill—not your click timing. Details: Throw Farther.
Mobile players get on-screen joysticks and the same Throw affordance; the HUD labels match PC even when the input method changes.
Training zones (side water)
Smaller water bodies beside the hub are auto-training stations. Walk onto the pad and your Skill begins climbing without spam-throwing the river. Early pads are modest. As you Rebirth, stronger stations unlock—community routes often cite a 4x pad after roughly two rebirths and a 10x pad after roughly five. Always stand on the highest multiplier pad you own.
Training pads are for Skill. The main river is for converting Skill into Wins via zone distance. A healthy session mixes both: pad until the next zone is realistic, throw to bank Wins, shop, return to the pad.
Throw button and river zones
Face the large river and press Throw. Your equipped stone skips through zone bands; farther bands pay more Wins. Clearing the final zone unlocks the next World with harder checks and new shops—track drops on Updates.
After throwing, confirm you still have your best stone and pets equipped. A strong inventory does nothing if you forgot to equip after a hatch or Shop buy.
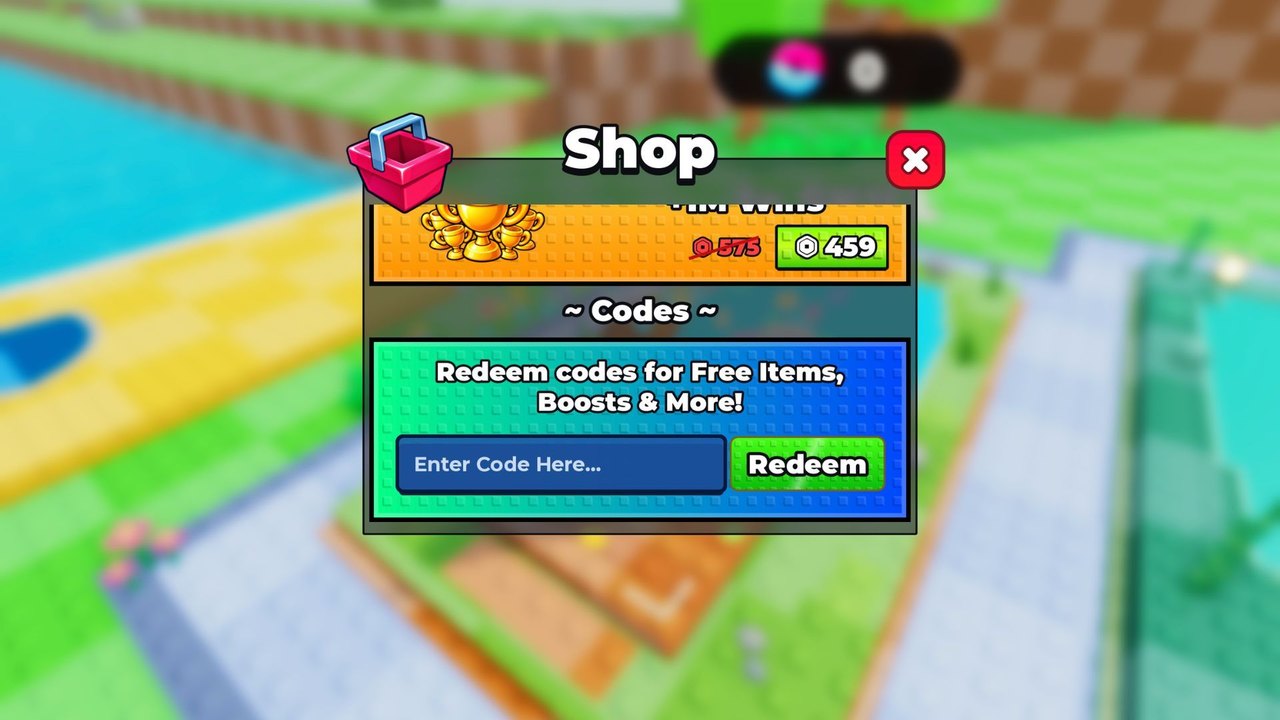
Shop HUD
Open the Shop from the main UI. Inside you will typically find:
- Stone types / throwables — additive Skill upgrades; buy these first early on
- Pet eggs — random companions with Skill multipliers; buy in batches later
- Potions — Skill, Win, and Luck bottles (~2x for ~10 minutes each when active)
- Codes box at the bottom — paste active rewards from the Codes page
Scroll all the way down for codes. Many players miss free potions and Wins because they only browse the top stone row. Redeem before long AFK pad sessions.
Rebirth meter
Look for the Rebirth control and the percent beneath it. That percent is progress to your current level cap:
- Below 100% — keep training; Skill still climbs
- At 100% — Skill is capped; open Rebirth and confirm the reset
Rebirth returns you near Skill 1 / level 1, raises the permanent Skill multiplier, raises the cap, and keeps stones and pets. Sitting at 100% is the most common HUD mistake in the game. Full timing guide: Rebirth Guide.
Potions on the HUD
When a potion is active, watch for the temporary buff indicator so you do not waste the window:
- Skill Potion — use on pads and rebirth recovery
- Win Potion — use when throws already reach high zones
- Luck Potion — use only during egg hatching batches
Mis-clicking Luck while AFK training does nothing for distance. Mis-clicking Win while stuck in zone one wastes the bottle. Match the potion to the job.
Pets and inventory cues
Hatched pets follow your avatar and should appear as equipped companions. After hatching, open inventory/equip flows and select the highest Skill multipliers. Pets persist through rebirth, but unequipped pets still waste power—same rule as stones.
Rank targets while you equip: Pets Tier List and Stones Tier List, summarized on the Tier List Hub.
First-session HUD checklist
- Move with WASD; find a side training pad.
- Open Shop; scroll to codes; redeem everything active on Codes.
- Buy and equip the next affordable stone.
- Train, then use Throw on the river for Wins.
- Watch the Rebirth percent; reset at 100%.
- After a few rebirths, migrate to newly unlocked higher pads.
- When Wins allow, Luck-hatch eggs and equip best pets.
Where to go next
- Beginner loop: Getting Started
- Distance: Throw Farther
- Loadout guides: Stones, Pets
- All walkthroughs: Guides Hub
- Optional QoL: Scripts
Once the HUD is muscle memory, every other wiki page is optimization instead of orientation.
Frequently Asked Questions
Quick answers to the most common questions.
What are the controls for +1 Stone Skipping?
Use WASD to move, Space to jump, E to interact, and the on-screen Throw button to skip your stone across the main river.
Where do I redeem codes in the HUD?
Open the Shop and scroll to the codes box at the bottom. Paste an active code from the Codes page and confirm.
What does the Rebirth percent mean?
It tracks progress to your level cap. At 100% Skill stops climbing until you Rebirth for a permanent multiplier and a higher cap.
Where should I stand to train Skill?
Stand on the side-water training pads. Use the highest multiplier pad you have unlocked through rebirths, then throw on the main river when you need Wins.